Wednesday, December 24, 2014

Lydia's Christmas Meringues

I'm going to let you in on a secret. While Santa goes out to deliver gifts all over the spiral, he needs someone to stay at the north spiral door and keep an eye on things. Santa knows that this is no simple task, and so he selects the only person right for the job, Lydia Greyrose.

Professor Greyrose, Christmas in the spiral couldn't happen without you. I wanted to make something for you to say thank you for all that you do for us. Being a fairy, you are very light and airy, and being so sweet, you must love candy. Thus as a thank you, I've decided to make you holiday Peppermint Meringues!

This recipe couldn't be simpler. All you need is three egg whites, 3/4 cup of sugar, peppermint extract, peppermint sprinkles, and of course, christmas ice magic.

These first few steps ight require the help of an older wizard to perform, but this is a dish that the whole family can get involved with. First, seperate the egg whites into a bowl and add the sugar. The getly heat the bowl over a pot of boiling water for about 3 minutes.


Then add the mixture to a stand mixer. Alternatively, you can use an electric hand mixer. I tried this recipe with a hand whisk at school. You can try,  but it won't be easy. You can spend hours whisking and beating those darn eggs, and they still won't be as fluffy and firm as they need to be. Please, if you really want to make this dish, use or invest in an electric or stand mixer. Your arms and patience will thank you.

Even with a stand mixer, these things take time. The real goal of mixing the eggs is to incorperate air. That's where meringues come from. a bunch of tiny bubbles building up on top of one another to form a foam which can be cooked and utilized with deflating. It can range based on the eggs and the day, but i find it takes about 15 minutes to form the foam to the point we need on average.

If you see that, you're golden. Take the mixture, and set it aside. Take a sheet tray, and cover it with parchment paper. Then evenly distribute the meringues onto the parchment. I find a spring loaded disher works awesomely for this, as the portions are equal, and it comes off easily. I only mention this because this mixture is super sticky! Be ready to scrape to get the last bits to form the last couple. i got 14 from this batch, but again, it will range.
From there, simply shake on as many sprinkles as you'd like. It's also worth mentioning, this dish is very open. You can change up the flavor or the adornment to suit your tastes. Go wild! The spirals the limit! Once you're all set up, move then to a 175 degree oven for 90 minutes. Why so long? Well don't think cooking. Think dry out. We want the meringues to be solid and something that can be held and bitten into. If we cook them at too high a temperature, the eggs become more cooked than dried out. Also, if salmonella is a worry of yours, don't sweat it! 175 is more than enough to kill the nasty bacteria, and they met much higher heat in the double boiler. Once they're out of the oven, resist the urge to pick them up. They need a little time to set. If you try and pick them up now, they'll be soft and may leave bits behind.
So there you go. Thank you Professor Greyrose, for making Christmas in the spiral possible. I've already sent you a big tin of meringues. Check your gift  box after you're done reading this. You'll see them. And thank you my fellow wizards and pirates. As this year comes to a close, and we come closer together, I wanted to make a festive dish post. I intended to write this sooner, but you know how busy the season is. Consider it a present left under the tree, much like santa, late on christmas eve night. Now i'd better pull off in my sleigh, as i've places to be as well. And until then,

Foodies of The Spiral, Happy Holidays

- Carlos


Monday, November 24, 2014

Extra Life Double Feature: Terrorwing Brittle and Avalon Apple Pocket Pies

Yes I understand. I haven't been posting. I'm sorry. It's just been a very busy weeks/month due to many real life obligations, the largest of which being school. However, being on Thanksgiving break now has given me a time to sit down and write out a post (hopefully more). Anyways, way back when, I posted the winners of my extra life design a dish contest. Sadly, of all the winners i've heard back from only Flash33 on central and Iridian WillowGlen. I invite the other winners to message me at any point moving forward, i'll always be willing to honor your prize. Anyways I figured I'd write out a double feature for both these recipes, as both are fall themed and would make a lovely addition to any Thanksgiving dinner.

First up is Flash. I heard back from him first, and he was direct and simple. He wanted a dish designed after the veteran terrorwing monster in Dragonspyre. Something that has always struck me about the draconians (why don't they have a pet yet!) is their wings. Their jagged, sharp, brown wings. This for whatever reason, made me think of brittle. Brittle for those who don't know, is a sugar syrup candy, which, when cooked to the right temperature, breaks off in jagged shards, almost like glass. In addition, there is usually some kind of nonperishable snack food mixed into the syrup at the last second, before it is poured out, cooled, and broken. With this brittle, I used roasted pumpkin seeds (it was the day after I carved a pumpkin for Halloween) so the timing was perfect. See Below: Veteran Terrorwing
If you'd like to make the pumpkin seeds yourself, it's super simple, and they taste great on their own. Just mix your washed and dried pumpkin seeds with ground cinnamon, ginger, cloves, and maple syrup. Then pour them onto a sheet pan and bake at 350 degrees (176.67 celsius) for about 15 minutes.

From there, we need the actual ingredients for the brittle, and it couldn't be simpler. All you need is sugar, water, ground cinnamon, and ground cayenne pepper. I know, that sounds crazy, but it's actually really good, and with a steady hand, it won't set fire to your mouth.


First off, add everything except for the seeds into a pot, and set it over high heat until it boils. From there reduce the heat to medium, and cook for another 5 to 7 minutes. From here you need to work quickly, as it sets up fast off the heat. Mix in the seeds with a wooden spoon, and then spread it out onto a sheet pan. From there, allow it to cool and break it up into pieces. That's all there is to it!


Next up is Iridian WillowGlen's request. She told me a bit about what she wanted hers to be. She mentioned her favorite world is Avalon, and how it's based off of medieval culture. She also noted how one of her favorite foods is apples. Well I happened to be in luck in this regard, as I know some odds and ends about medieval food myself, especially medieval England. Way back in the day, the English loved and I mean LOVED spices. Not only were they a sign of wealth, they created jobs thanks the British East India Company (as well as others like the Dutch). They also used a lot of bread. Back then, most common people didn't have fancy plates and utensils, or any for that matter. Oftentimes, food was served on big slabs of hard bread, or baked into hand pies. These crusts were usually eaten along with the food. Also, they loved dried fruits and fruits that were available fresh. Without modern medicine, the vitamins and minerals found in fruits and vegetables helped to keep people healthy.

Okay, history lesson over. When I heard Iridian liked apples, I knew immediately I could make apple hand pies. This would both allow me to capitalize on the pie aspect, but funnily enough, most of the spices associated with fall and apple pie, were also some of the spices that medieval people went crazy for. So without any further introduction, here are Avalon Apple Hand Pies!

Here's what you'll need to make them:
  • 2 cups of flour
  • 2 teaspoons of baking powder
  • 3/4 teaspoon of salt
  • 3/4 cup of milk
  • vegetable oil
  • 2 apples
  • 1/2 cup of raisins
  • ground cinnamon
  • ground cloves
  • ground ginger
  • 1/4 cup (roughly) of brown sugar
  • 6 Tablespoons of butter (softened)


First things first. There's an egg in one of those pictures for some reason. Not sure why it's there. Moving on! Peel and chop the apples into small chunks. Normally slices would be fine for a normal pie, but hand pies are more pocket sized, so chunks is the way to go.


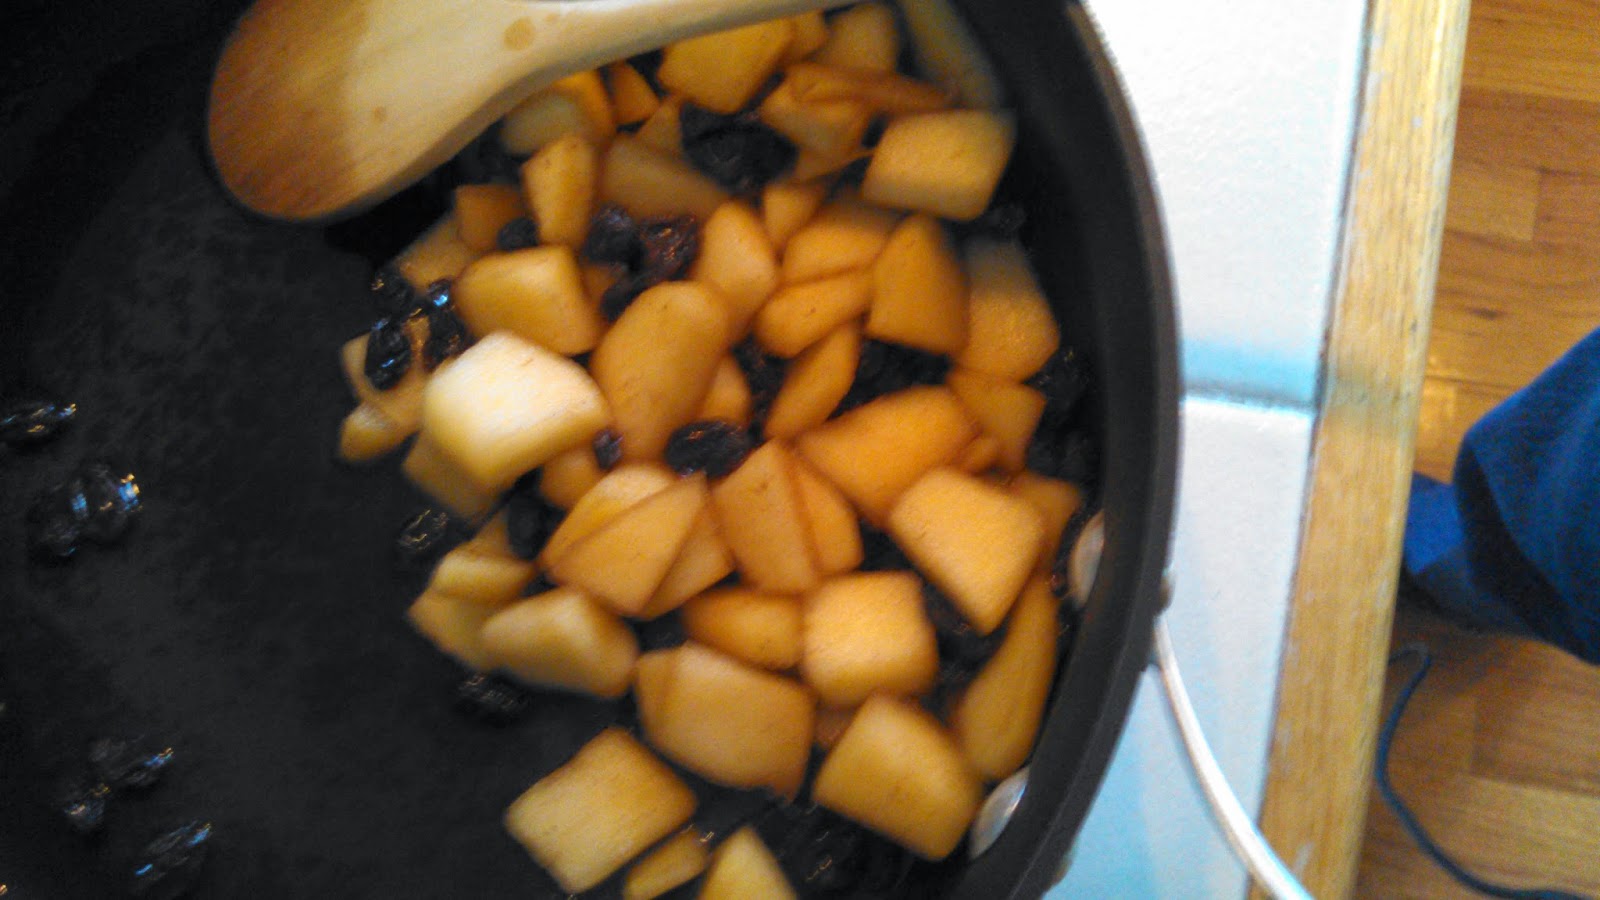
Then in a pan over medium heat, add the apples, sugar, raisins, and a dash of each spice. I also added some water, to help form a sauce, and to stop things from burning. Fruit loves to burn, it's our job to not let it. Cook everything down until the apples are soft and take on some color, and the sugar is fully dissolved.


Next we want to form the pie dough. Don't be afraid, it's not scary like a real pie, and it can have cracks and lumps. Measure the flour, baking powder, and salt into a bowl, and give it a shake to combine them. Then take your butter, and cut it up into small chunks. Add it to the dry mixture, and using your fingertips, sort of rub it into the flour, combining it. It's kind of weird and unintuitive, but it works and gives it a great texture. Work quickly and with only the fingertips though, as we don't want the butter melting. From there, add the milk, and give it a mix with a wooden spoon to combine. Then turn it out onto a floured work surface, and flour your hands(trust me). Then knead it together. It'll be both crumbly and sticky, but kneading with flour and adding little drops of water as needed will form it together. It'll still be slightly sticky, but it'll be workable.

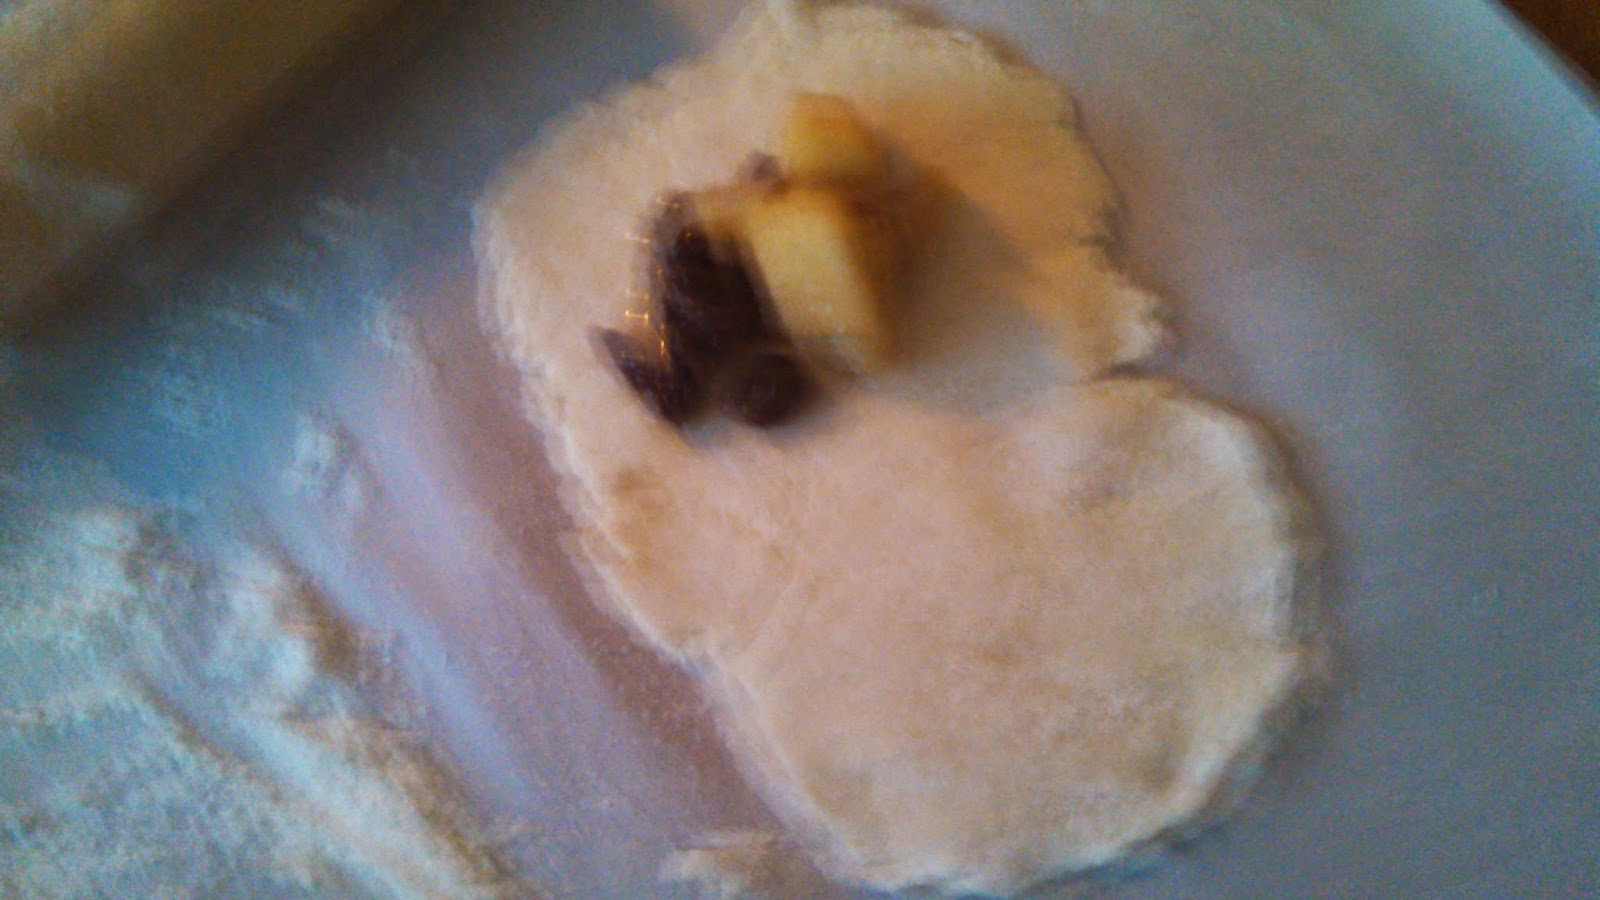
Then, break off a piece of the dough. I like to make about eight pies, and I sort of estimate, so they aren't all the same size, but if you prefer uniformity, divide the dough into eight pieces.  From there, take one, roll it out (flour your hands and the rolling pin or the dough will stick again) and form a circle as best you can.  From there, add a small amount of the filling, but make sure it's small. Pack it too full and it'll burst open on you during cooking.


After that, fold the dough over and fold up the extra bits hanging out. Then use a fork to crimp the ends, sealing everything up. Take the same fork, and poke holes in the top of the pie( this is called docking it) to allow steam a way out. Move the finished pie to a sheet tray, and begin to work on another one.


Then over medium heat, add the oil to a pan. Let it heat for a few seconds and add pies to the pan to cook them. Don't overcrowd the pan, they need space to cook. I stick to about two at a time. Don't worry about them sticking however, they move around a lot, and are actually a little slippery when it comes time to flip them over. Speaking of, I try to flip only once, but a quick flip and flip back to check for color won't hurt at all. Just brown them on both sides to cook the dough. It's rolled out thin enough so that the inside cooks. Move the finished ones to a platter and that's all there is to it! Store these in the fridge to keep them as long as possible, although, with the way they taste, don't expect that to be long.


There you go, two wonderful festive fall dishes. I'd like to say thanks again to Flash and Iridian for all you did for the extra life cause, as well as the whole team. I hope you all enjoy these dishes, and whether you decide to add them last minute to the thanksgiving table or not, I sure hope you'll give them a try. Foodies of the Spiral, have a happy, healthy, and safe Thanksgiving.

-Carlos

Sunday, October 26, 2014

Extra Life Contest Winners

Before I say anything, I just want to say how proud I am of all of you. Together, KI gamers raised (at the time of writing) 9,035 dollars. Our original goal was one thousand, and later 5 thousand, and we crushed both of those goals. It makes me so happy to see us all coming together for a great cause like this, and I hope that we can go even farther next year!

As for the winners, I had to tweak things slightly. Turns out, most donations were done by non team members or anonymous donors. That being the case, I had to pick ten people who raised an impressive amount. I also decided to pick people who signed up as their wizards. I did this for a couple of reasons, those being internet safety, and also to respect the privacy of those who used their real life names. I would however, like to highlight the team member who donated the most, Timothy Titan, who gave an incredible 201 dollars. That absolutely rocks, and he's going to be at the top of my list in terms of which article I write first. Following that, I'll make the articles in order of response back to me. In a month or so, I have a break for Thanksgiving, followed shortly after by a December break. I'm hoping to try and fufill most of the articles during this period, but if I have time sooner, I'll try to fill one when I have time. So without further delay, here are our winners, in no particular order.

  • Timothy Titan
  • Vanessa Mythdust
  • Sarah Battlethief (may need some help finding her)
  • Austin Ironslinger
  • Shadow Wyvern (on central)
  • Iridian Willowglen
  • Jason Fireblood
  • Edward Anvilshard
  • Seth (flash33 on central)
  • Destiny Devereaux
As a reminder to our winners, they have the chance to ask me to create a dish based on something in either game. Could be an area, could be an npc, it could even be them! Two rules however, do apply. First, it has to be g-rated, this is a family friendly blog. :) Second: If it is your wizard/pirate, or if it is something from pirate101 (I haven't played it I'm afraid) then you'll need to provide me a little backround info on what it's about so I have a basis to go off of. Other than that, if you like any type of food, let me know, and I'll try my best to deliver what you ask. I'm very proud of all of you, and that means the whole KI team, and I think we truly did something wonderful. For the ten winners, you can reach me in several places to request a dish. I'm on twitter, (@monoplox), leave a comment here, on central, (@monoplox) and through my in game/blog gmail.(carlostrollfist@gmail.com) Until then, Foodies of The Spiral, UNITE!

- Carlos

Sunday, October 5, 2014

Extra Life: Biting Into A Good Cause

 Reposted from my extra life page: Support me here and find the rest of the team -> http://www.extra-life.org/index.cfm?fuseaction=donordrive.participant&participantID=113638


Hi there everyone. My name is Carlos Trollfist. You may or may not know me, I'm a fairly reclusive member of the community. When I first heard about the fundraising and how KI and our lovely Professer Greyrose were putting together a team, I decided to sign up and see if I could help raise more money for the hospitals and the wonderful work they do.
This actually means a lot to me.A few years back, my older sister was having some serious throid problems. She ended up having to go through several surgeries, and made a full recovery. During the time, I was a little too young to fully understand quite what she was going through, but being a bit older now, I understand how scary it must have been for her. Looking back, the people who worket at the hospital she was admitted to, (one that was paid for by my parents' insurance) the staff who oversaw her really were wonderful, always working to see her mind at ease and do that extra thing to make her happy.
I realize that not all children who need that kind of care can afford it. That's why i've made a page here. My parents were fortunate enough to know that my sister would receive that extra special caring treatment. Not all parents can guarentee that for their children. I hope that by working to raise money here, we can as a coommunity give more parents that peace of mind.
I regret to say this, but I myself don't really have the financial ability to donate to this cause. That being said, I want to do what i can to give others incentive to donate further to the cause. That's where my blog comes in. I have a small blog related to KI's first game, Wizard101. My blog is called "The Culinary Conjurer". On it, i create food and relate it to npcs and others aspects of the game and what's going on both in the game and real life.
So how does my blog help things here? Well that's a good question! The top 10 team members for KI gamers, who donate the most themselves, will be given an oppertunity to request me to make something to be featured on my blog.
Now there are a couple of rules I need to set up for the sake of clarity. First, please note: the ten chosen will be the ten who donate the most themselves, not the 10 who are able to raise the most. I understand this may be a bit backwards in terms of thinking, but if i say the ten who raise the most, the list and subsequently, the donations may remain stagnant to where they are now. I'm trying to increase cash flow to the organization, and thus i'm going about it this way. Secondly, please note, the money donated does not have to be to my personal page. I want donations increased in general. It doesn't really bother me who you sponser so lon as you sponser. The third and final rule is about time. This contest of sorts will run until 12pm EST on October 25, which is the actual day of the event. At that time, i'll tally up the ten team members who donated the most, be it through comments or other social media if i am aware of it (twitter, central ect.) so be sure to check your comments on that day to see if you've won.
After i've contatced the winners, you can email me at carlostrollfist@gmail.com, with the dish you'd like and what you'd like it based on. For this contest, the limitations are pretty open. You can request an area in the game, an npc you like, or even you wizard or pirate. Please note, if you choose for it to be yourself, tell me a little bit about your wizard or pirate, so I have a little to go off of. Then all you have to do is keep an eye on my blog, and wait for your article to come. I'll make sure to send you a follow up message to let you know when so you'll be sure not to miss it.

So that's all I have to say. I really think this is a great cause, and while I myself cannot donate, I hope this acts as incentive for others to push themselves to help out a great charity. Together, we as the KI community will make a difference.

Foodies of the Spiral, UNITE!

- Carlos

Tuesday, September 30, 2014

Moodah Milkshakes

So it's been a while since i've posted hasn't it? Sorry about that. We all get swept up in the hustle and bustle of post summer life I suppose. I am no exception to this. But by no means have i given up on this blog. Not at all. I've jut been struggling to find the time to cook. The writing isn't the problem. I could go on for days writing without any problem. But cooking is an important vehicle to the blog.

I figured then, since we all seem to be very busy and stressed, to take a moment to relax, and center ourselves. We could use a teacher to help us find inner peace and balance. And who better to do that than the Moodah? He is the atomization of peace and calm. Then why not try to emulate him? Better yet, emulate him by making food he may himself eat!

And that brings us to Moodah milkshakes. I can see him enjoying them on several levels. Perhaps most importantly, they're bright and green, much like his native land of Mooshu. Green is a peaceful happy color. Both the Moodah and milkshakes start with the letter M. Word association is always important with food. (Ok so maybe it's not, but it does make it seem more fun on the written page). Also the Moodah is a cow. Or is he a bull? If he's a bull, then he's a he. But the Moodah certainly looks like a cow, he doesn't have horns. But that would make the Moodah a  she. And the voice actor for the Moodah is most certainly male. Hmm. This poses a problem. For the sake or argument, let's say the Moodah transcends gender, and thus, everyone wins. As i was saying, milkshakes have milk. And bovines drink and produce milk. This all may seem a bit silly, but it proves a point. The Moodah would most certainly definitely drink green milkshakes. So by making them, we can emulate his inner calm.

I need to make a disclaimer here. This recipe didn't quite turn out as i hoped it would. And that's fine. Everyone makes mistakes, especially when trying new things. The kitchen is no exception. I've never made milkshakes before. I don't even really like them. I just got this idea in my head and it seemed really cute and fun so I went with it. All i'm saying is, recreate at your own risk. It doesn't taste bad per se, but a milkshake it ain't.

So here are the ingredients:
  • Milk
  • Vanilla Ice Cream
  • Green tea
  • Lemon juice (not fresh. shame on me.)
  • Green food dye (pictured seperately. Not entirely sure why,  but there it is.
  • Sugar
  • Water 
So in all fairness, yes i should have used exact proportions. But it was late, and I wanted to get it done. I've no one to blame but myself. So first things first. In the blender, add the milk, ice cream, and lemon juice. Then put the water in a kettle and boil it. 


Let the kettle do it's thing. Then when it's boiling, remove it from the heat and brew the tea. Once that's done, add it to a pot with the sugar and boil it. To be fair, this was my major problem. I had so much tea, but i never let it cook down enough into a syrup, and it was essentially just hot green tea. Not  what i was going for. Also the more i blog, the more i realize i make syrups a lot, and i should probably try to branch out a bit. Oh well, there's always a next time!


Then it's just a matter of adding the green tea syr... water to the blender. I probably added too much here as well, but  green tea has a subtle flavor. Then I added a few drops of green food dye, which i held off  till now, because i didn't know how much the tea would mess with the color. After that i blended it up. I noticed I had a milkshake button on the blender. Sadly, not even it could save this dish. Then all that was left was to pour it in a glass. I don't have a picture of that, because in essence, it was green milk.


Oh well. Live and learn I suppose. Better to  learn though. I realized my mistakes, and should i choose to try again, i'll know  what pitfalls to avoid. So this was not for naught. And besides, it still tasted alright. Maybe a bit warm, even though i did chill it, but no big deal. At the very least i can say i've made green milkshakes, and who wouldn't want to  say that?

I'm excited for the upcoming months. Today marks the end of  September, and the we draw closer to my favorite month of all, November. But October is pretty great too. Fall flavors coming out to play, and no, I do not mean pumpkin spice. Honestly pumpkin makes the spice, not the other way around. But i digress. I really love fall, and i love cooking in fall. So every chance i get, i'm going to be in the kitchen. That being said, I'll also be trying to make as many posts as I can. I just need to think of ways to tie Fall into the game, but that shouldn't be terribly difficult. Until then, Foodies Of The Spiral, UNITE!


Thursday, September 4, 2014

In The Schooltimes

Hey there my spiral foodies! So I realized. Even though i'm in  a dorm, and as such, i can't do all that much culinary, I want to blog more. However, this is a food blog. So without food, how do i blog? Good question! Well I came up with an idea. Two actually, but one will be more immediately relevant than the other.

So here's the deal. This is the more long term project. I'm making an internet suggestion box of sorts. On any of my posts, leave a comment with what you want to see me cook. Go as big and as zany as you please! A few rules though. Firstly, it's got to be vegetarian. I am one, and as such, cooking my animal friends isn't something i'm too keen about. Secondly, age appropriate. That's pretty standard issue. This is a food blog based on a family game, not an erotic bakery online. If you want the latter, this is not the blog for you. Third, it's got to be related to Wizard101. But ARRR, I here you calling. My apologies my briny buddies, but i don't play Pirate101 (subject to change, maybe! No promises.), and as such, I wouldn't really connect to what i was making. If you pass all three rules, who knows! Maybe you'll see your suggestion get the Culinary Conjurer treatment! Please note, I'm not obligated to make your suggestion if it is submitted properly. It's based on time, and interest. If its something that feels like i've done it before, i may not want to do it again (looking at you gelatin), so please understand that.

Okay so moving forward! Short term, my idea is cooking help! If you have any questions about food, which cheese to use in your Greta Darkettle Grilled Cheese, (I need to make that now) or how to cook down your apples for Crystal Grove Crumble (That too), send me a comment! I've been cooking a long, long time, and I know a lot of tips and tricks to make your life a bit easier. A kitchen can be a bit daunting at first, but a little magic can fix that right up.

So that's what's going on with the blog. Still going to cook, just filling in the gaps with other things. Hope to be back on the burner for you all soon, but in the meantime, Foodies Of The Spiral, UNITE!

Wednesday, August 27, 2014

Back To School Ambrosia Ice Cream


It is unavoidable. The summer is drawing to a close, and for many of us, this means a return to our schools, unfortunately of the non-magical variant. Many of you are already back in your various places of learning, and i myself go back on Friday. So I say, why not give summer the sendoff it deserves!

How you ask? Well ice cream of course! Ice cream screams summer, and we scream for ice cream. Well i don't, but i'm just sort of a softspoken person. Anyways, I wanted to make this ice cream special. To tie it to someone synonymous with a new school year. And that of course, would be Headmaster Ambrose, or as we call him, Eatmaster Mmmbrose. Ambrose has a name that sounds like only one food i know of. The classic southern dish, ambrosia.

If you've never had ambrosia, it's a bit hard to describe. I've never had it myself, but i know what goes into it, and well... let's just say it's  a dish from an older time and leave it at that. So what i did was take the essence of ambrosia, and gave it a more modern flavor profile, while sticking to its roots, and then shoved the results into an ice cream.

Anyways, here's what you'll need:
  • 1 1/2 cups of sugar
  • 1 can of coconut milk
  • 1/2 cup of blueberries
  • 1/2 cup (roughly) strawberries
  • 1 orange
  • 1 can of fruit cocktail (the classic ambrosia component)
  • 1 cup of water
  • Not Pictured: 1 banana, lemon juice
Ok so first things first! Take your blueberries and get them into a covered pot with the sugar and water. Set it over medium high heat and just let it cook for a few minutes. No need to stir, the sugar will dissolve of its own accord. Keep a close eye on it though, it can boil over in a moment's notice, and when hot berry syrup meets stove, it equals bad news. So keep an eye on it. Once you've let it go for a few minutes, it should look reddish purple in color. This is your indication to pull it from the heat, and strain it into a bowl. Press on the berries with the back of a spoon, get all the juice you can out of them.

So the next few steps are relatively easy. First, cut the tops off of the strawberries. Pretty though the leaves may be, their flavor is not too friendly. Then open up both the cans of fruit cocktail, as well as the coconut milk. Be super careful with this. I have a rather nasty scar on the knuckle of my thumb from a pull top can, and i have a hatred of the things now. So learn from my mistakes and keep it safe. Also while we're here at the cutting board, slice the orange in half and juice it. What manner of machine you use is completely up to you, i have a manual stand model myself.


Now comes the point of assembly for the base. Add the strawberries and half of the cocktail into a blender. Make sure its a big one, this is a lot of liquid going in! Then add the orange juice, blueberry syrup, and finally the coconut milk. I add it last because, as it runs down through the blender, it looks really cool.  Then give it a whir, but do so gently. Short pulses to intergrate everything work best for me, so as not to have it overflow. It'll have a nice purple color at the end.


Now take this to the fridge for a long chill, overnight is best. This is vegan ice cream, and honestly, there isnt really enough fat in the coconut milk for it to solidify the way it needs to in the ice cream machine if it isn't done as quickly as possible. Also, make sure your ice cream churn has been in the freezer for a couple of days for it to work best. Note please, base in the fridge, don't let it get solid.

Ok, if you've done all that, the time has come for it to spin! Remember, we have to do this fast, or else things will melt on us. Set everything up, and then return to the cutting board. Break down the one banana into small pieces. Then in a bowl, combine it with the remaining cocktail and a bit of lemon juice. The lemon juice will stop the banana from oxidizing and going mushy and brown. Mushy and brown is not magical and delicious. When the mixture starts to thicken, (it'll only be somewhat) add the fruit mixture and give a minute or two to integrate. It'll take a little time, but just let it do its thing.


Once everything is well mixed, take the entire base and move it to the freezer, for a few hours at least. The ice cream will have a chance to firm up in here. After a few hours, things will be a soft serve consistency. Leave it longer, and you've got a scoopable cone friendly delight. I like to keep mine plain though, a bowl and i'm good. But hey, that's up to you.


And there you go! Ambrosia (kind of) ice cream. This one's for you Mmmbrose. so raise your wand and trade it for a spoon. I had mine at soft serve, so one scoop wasn't doing too well in terms of solidity. Anyways, thank you for reading, and I hope you'll try this out. And hey, double win! It's vegan, so our animal friends can be happy too. If you don't tell people, they wouldn't even know! So be sure to try this out, and send in a comment if you run into any problems or questions. Foodies of the Spiral, UNITE!